Bot Creation 🤖
Add Bot
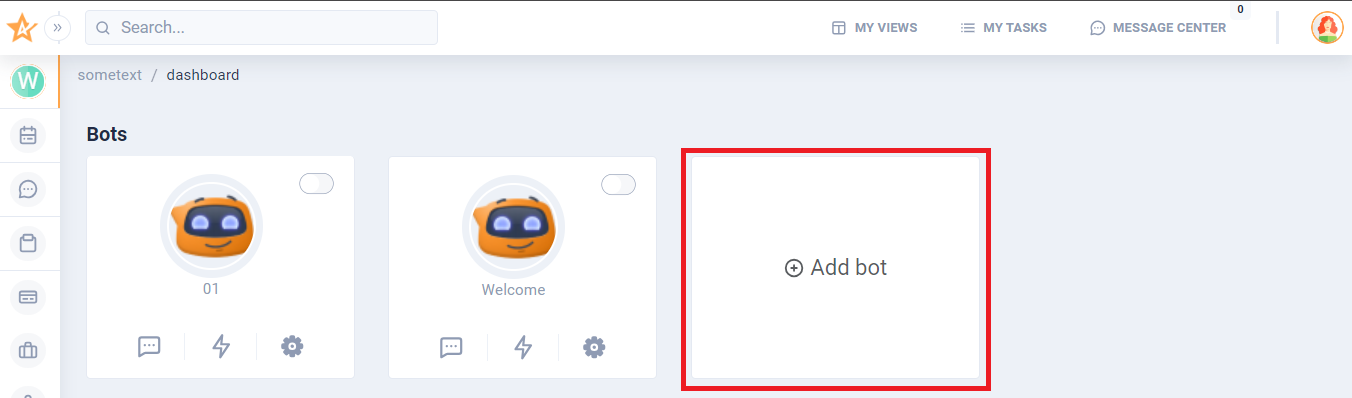
To add a bot, log in and find the |
|
If the user already has bots, the ADD BOT button will be located at the right of existing bots. |
|
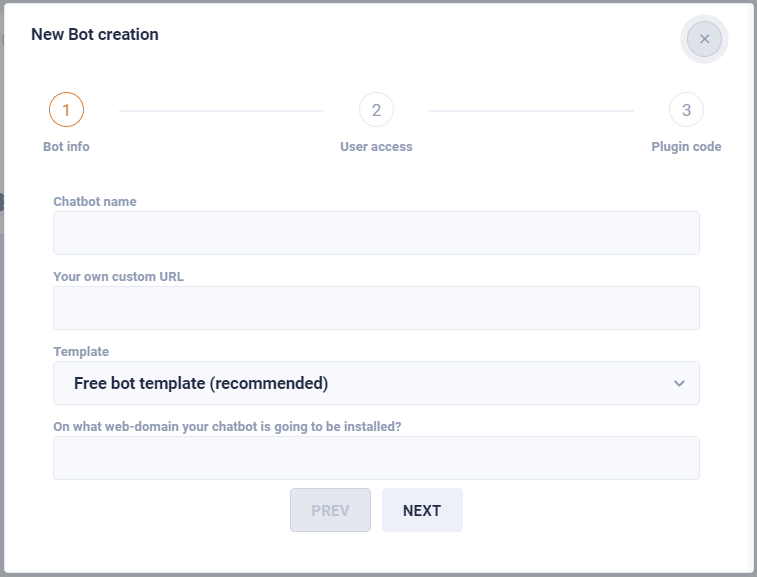
Bot infoAfter the user has clicked on the |
|
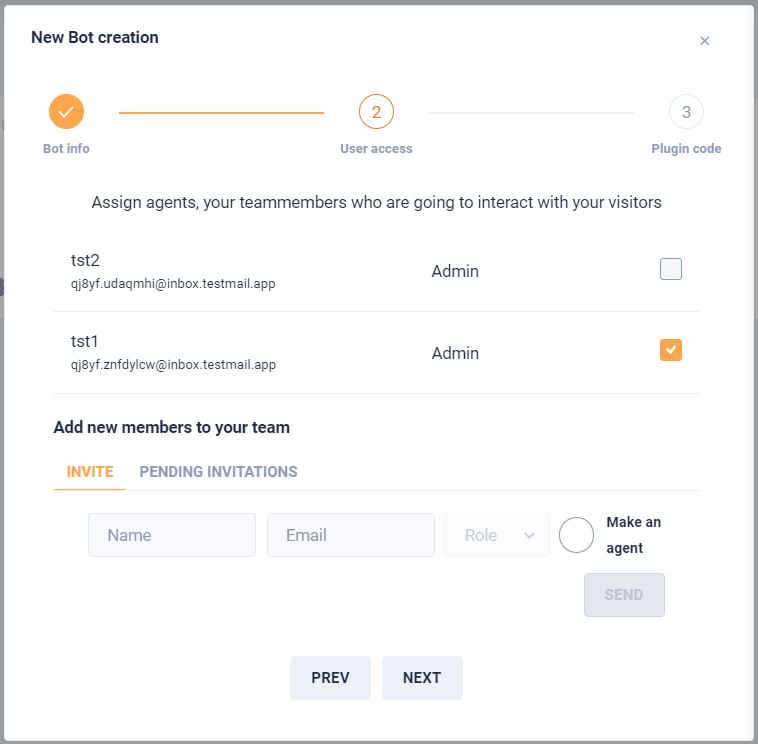
OperatorsThen you get an option to pick some operators who will be working with this bot: |
|
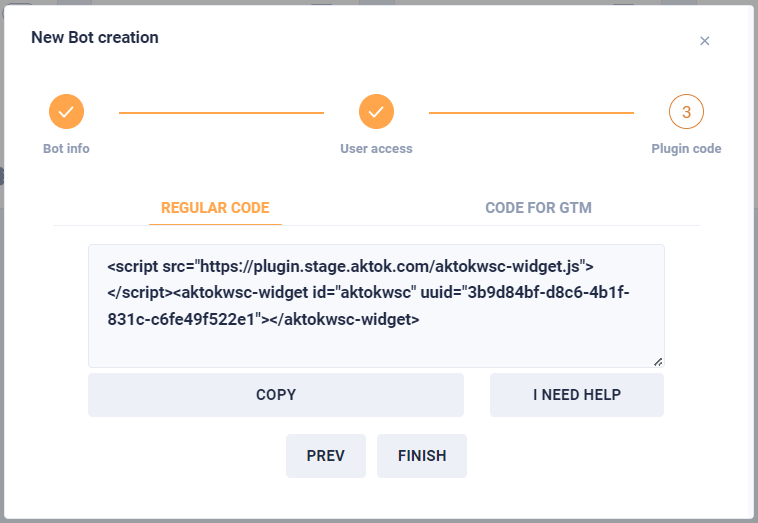
VerificationAt this step, it is necessary to complete the bot configuration. |
|

Bots list
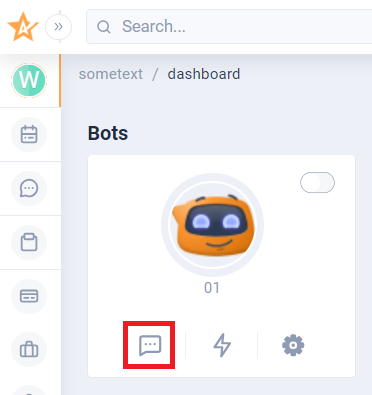
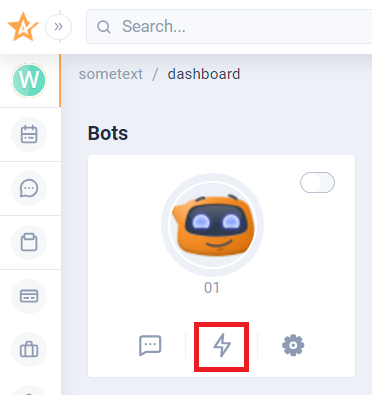
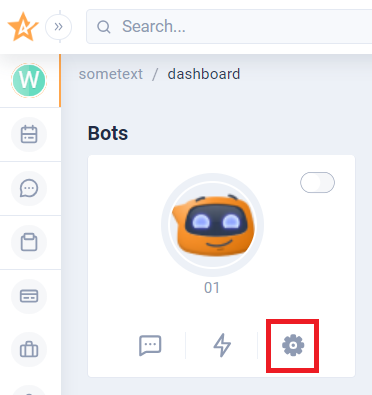
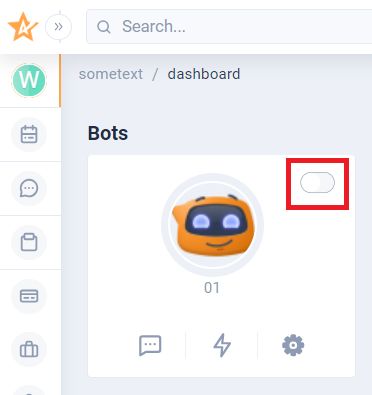
After creating your first bot you’ll see it on the dashboard. There are multiple options at hand:
Inbox button will take you to the list of chats. More about Inbox here. |
|
This is a button that takes user to the automations. User can add new ones or manage existing. More about workflows here. |
|
Here you have main settings for your bot - name, preferences, image etc. Also you can remove it in this section. |
|
With just one click right at the list you can turn your bot on and off! |
|
DEV NOTE Using bot templates
DEV NOTE Assign agents (team members) who are going to interact with visitors
DEV NOTE Adding a bot script to the site
DEV NOTE Request help building a bot